Grab the latest DMG from the
releases page, open
it, and drag Parrot into Applications. That's it. If you'd rather build from
source, clone the repo and run make run.
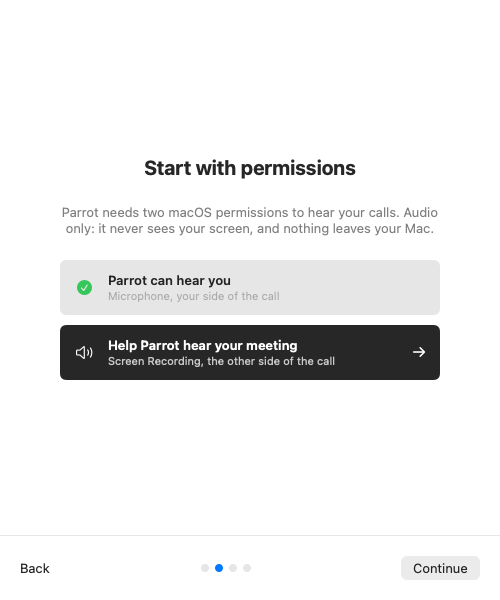
On first launch Parrot walks you through two macOS permissions. Click each dark button, answer the system dialog, and the row flips to a green check on its own. Both are needed to record a call properly:
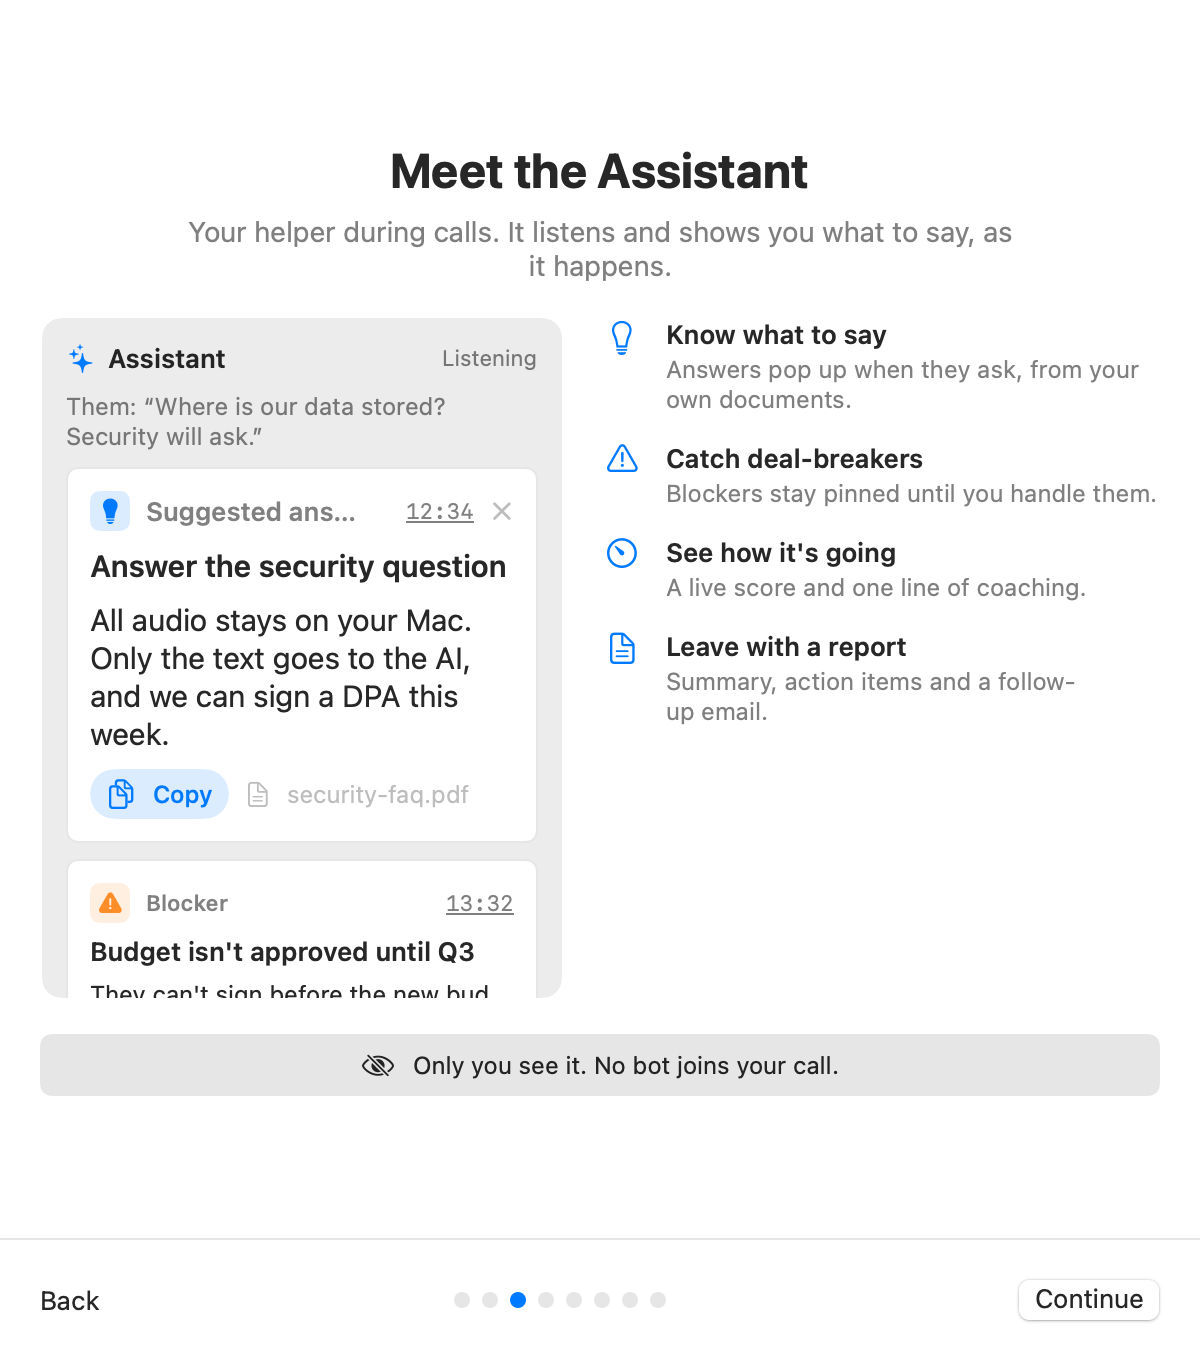
Next, a short example of what the Assistant does during a call: when the other side asks something, it suggests an answer from your own documents, pins deal-breakers until you handle them, keeps a live score, and writes a report after. Only you see it; no bot joins your call.
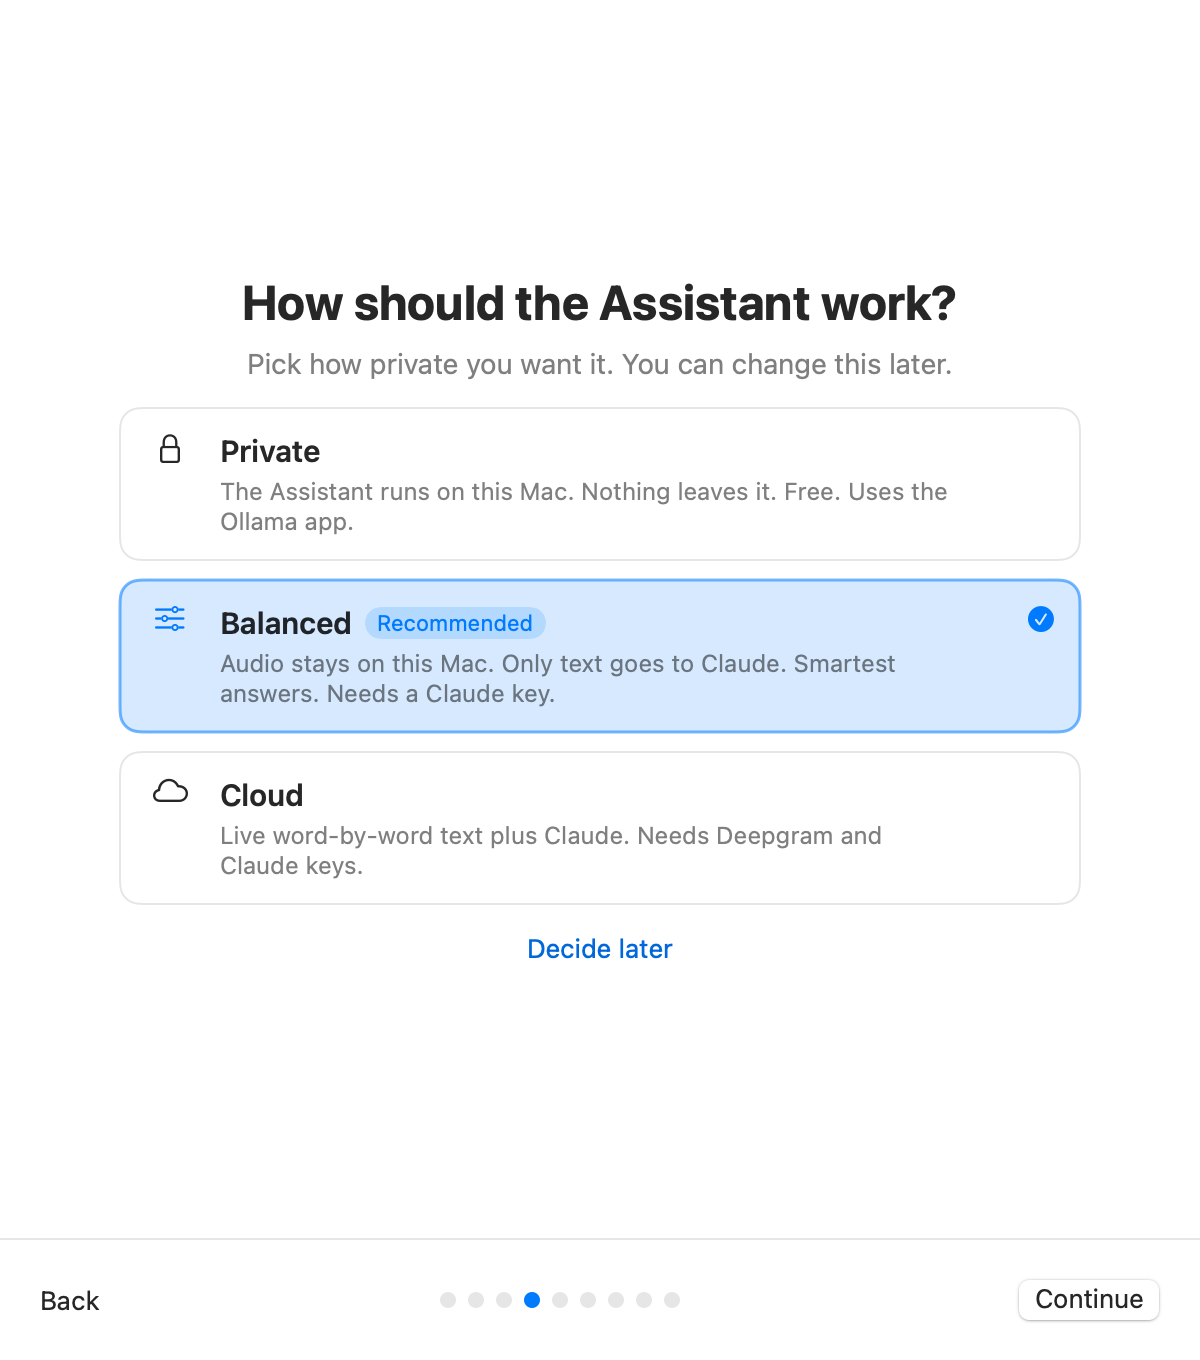
Not sure yet? Pick Decide later. A card on Home lets you set the Assistant up any time, and so does Settings → Assistant → Set up the Assistant.
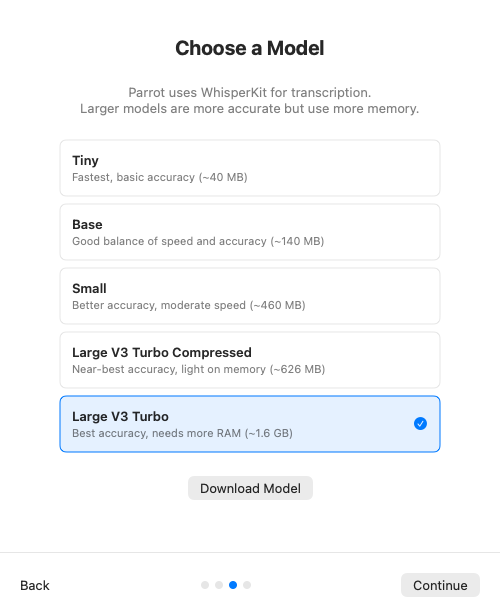
Transcription happens on your Mac. Parrot picks the model that fits your Mac and starts downloading it right away. Parakeet v3 is the fastest, but it only knows 25 European languages, and Turkish isn't one of them, so Parrot suggests it only when your Mac's languages (and your past calls, if you have any) all fit. Otherwise it picks Whisper: Large V3 Turbo on Macs with 12 GB or more, Base on smaller ones. Large V3 Turbo Compressed is the in-between: nearly the accuracy of the big one at a third of the download. The download carries on after you close the setup window, and the record button waits until it's done. After that, transcription works offline.
You can switch models any time in Settings → Transcription.
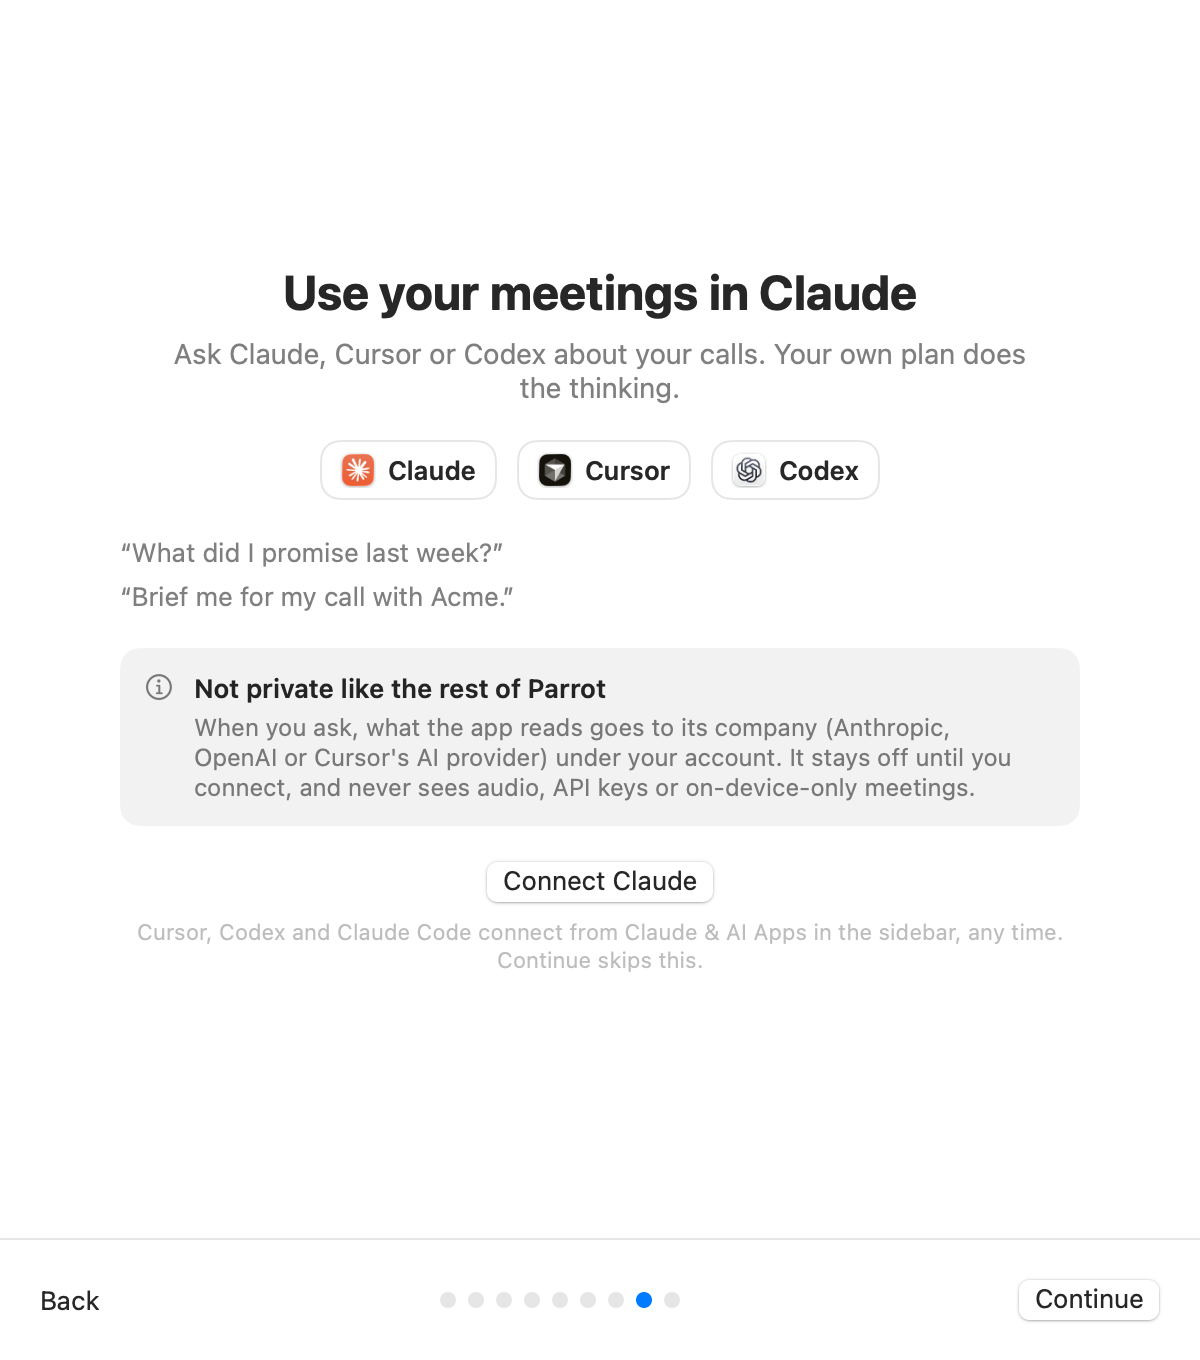
Near the end, the tour shows how to ask Claude, Cursor or Codex about your calls. Connect Claude turns on Allow AI apps to read my meetings and opens Claude's install screen: click Install there. Continue skips it, and Cursor, Codex and Claude Code connect from Claude & AI Apps in the sidebar any time.
This is the one part of Parrot that isn't private like the rest. When you ask, what the app reads goes to its company (Anthropic, OpenAI or Cursor's AI provider) under your account. It stays off until you connect, and never sees audio, API keys or on-device-only meetings. If you picked Private, the tour leaves this step out. More in Use your meetings in Claude.
Missed something, or quit halfway through the setup? Parrot brings the tour back on its own until you finish it, and you can replay it any time from Help → Show Welcome Tour.
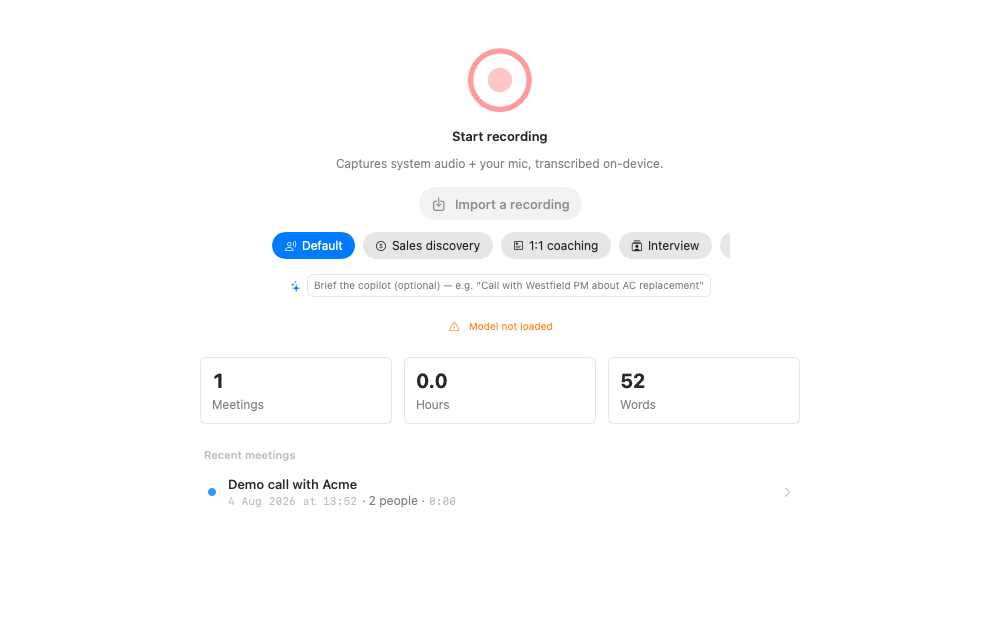
Hit the big record button and talk. The transcript shows up as you speak. When you're curious about the AI side of Parrot, read Setting up the Assistant. It's optional and off by default.